


Outdoor Bar for Garden & Patio
DO IT YOURSELF
What could be better than ending a warm summer evening with a few delicious drinks outdoors? With this DIY project, you can easily build your own stylish outdoor bar and create a real highlight for your garden or patio. Just grab your Power X-Change cordless tools, gather some friends or family to help you build – and later toast the finished bar together. Let’s get started!
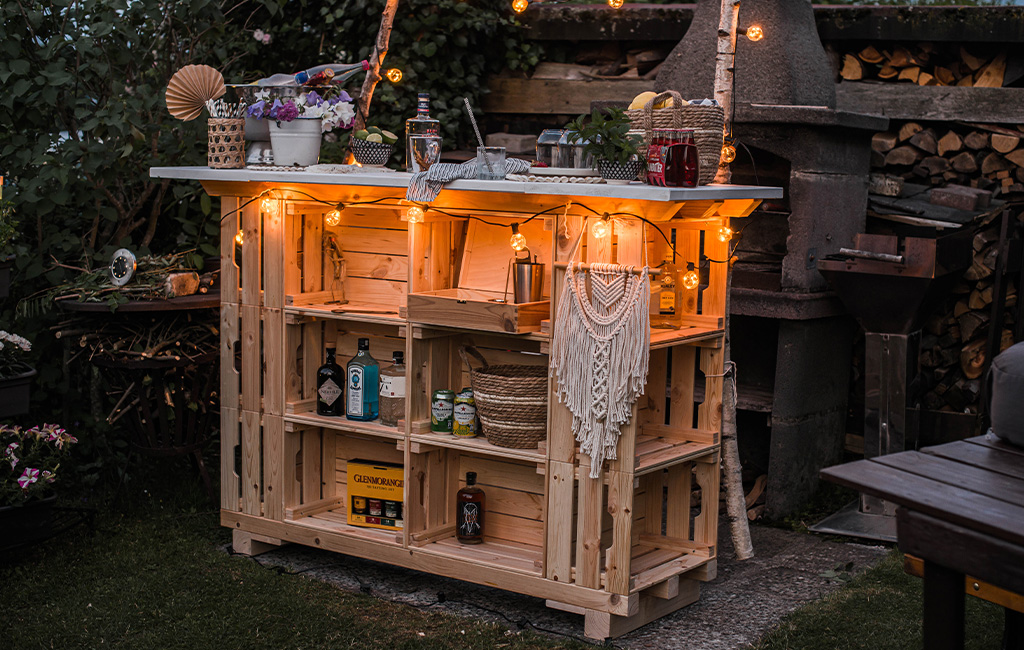
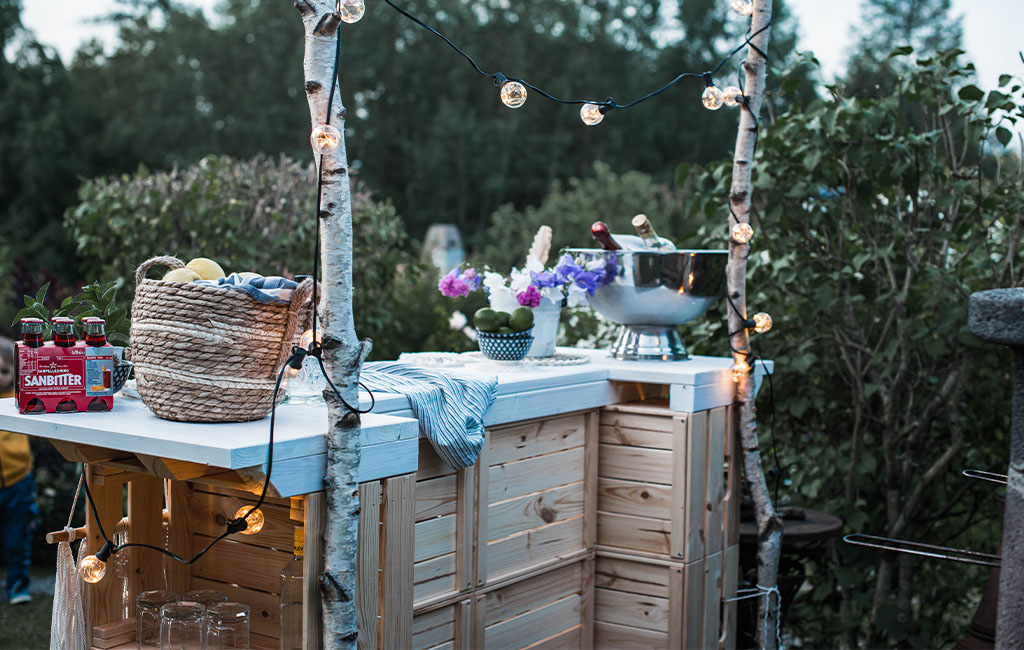
With lighting and decoration, your self-built garden bar becomes an absolute highlight in any outdoor space.
Tools and Materials
Tools
- Cordless impact drill/driver
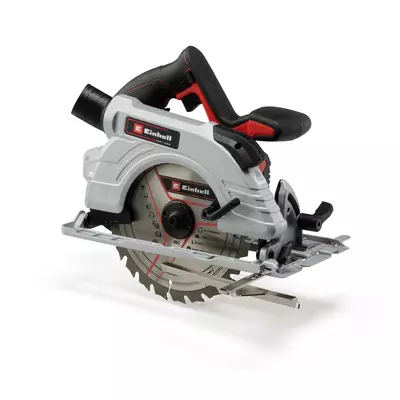
- Cordless circular saw
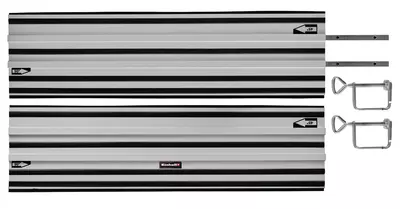
- Aluminium guide rail
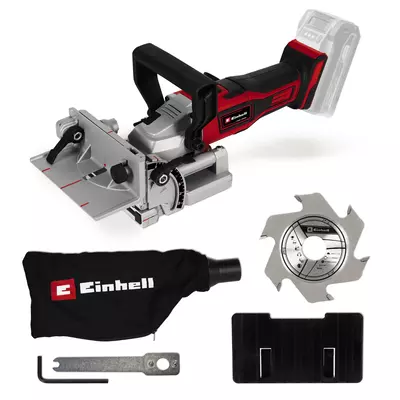
- Biscuit joiner
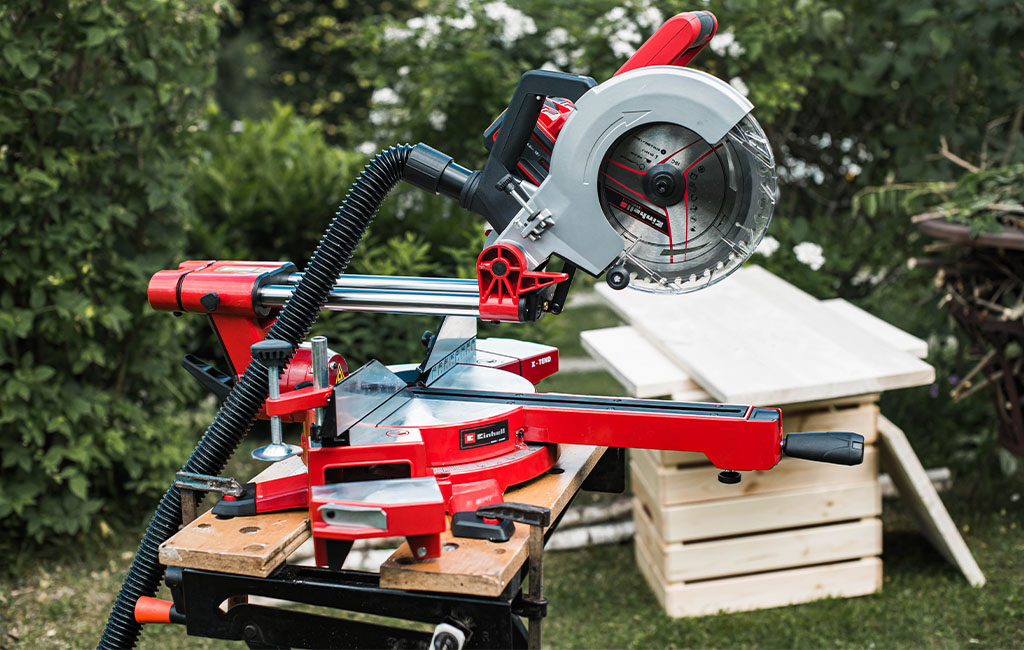
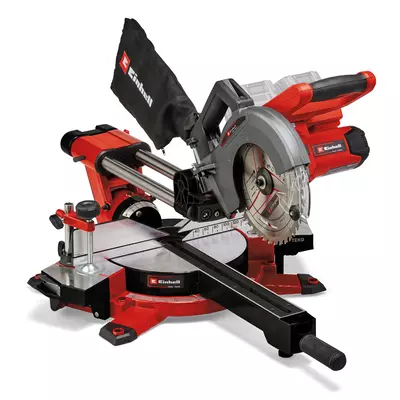
- Cordless sliding mitre saw
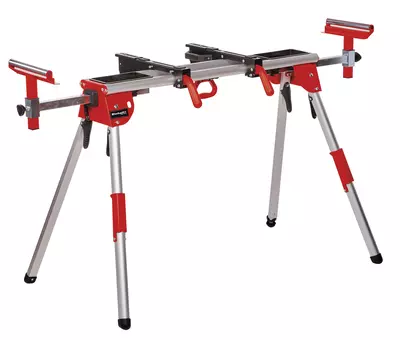
- Saw stand
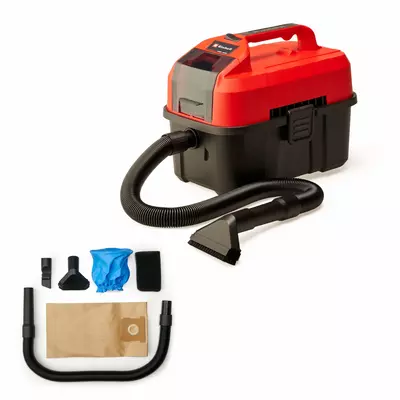
- Cordless wet & dry vacuum cleaner
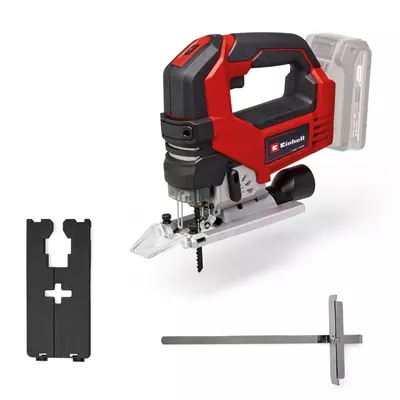
- Cordless jigsaw
Materials
- 12x Wooden crates (pine): 250 x 3100 x 460 mm
- 2x Laminated wood panels (spruce): 28 x 400 x 1200 mm
- 4x Square timber: 54 x 54 x 2000 mm
- 1x Square timber: 18 x 100 / 120 x 2000 mm
- 2x Straight branches (birch) or bamboo sticks: approx. 1200 mm in length
- Stainless steel wood screws:
- 4x 40 mm (approx. 50 pcs)
- 4x 50 mm (approx. 50 pcs)
- 5x 70 mm (approx. 30 pcs)
- 6x No. 20 wooden biscuit dowels
Instructions for Building the Centre Section
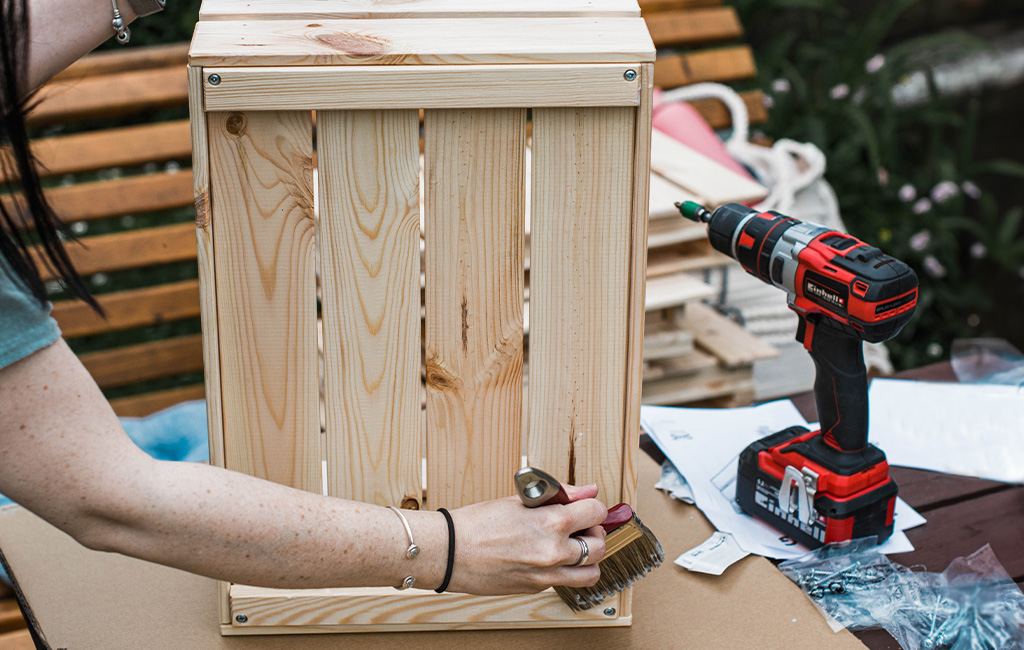
Step 1: Assembling the Crates
We’ll start with the centre section of the bar. This consists of 12 wooden crates – 6 for the front and 3 on each side end. Begin by aligning the crates in their intended positions and screw them together to form a stable base structure.
Step 2: Painting the Crates
If the wooden crates are untreated, you can go ahead and paint them straight away. For a natural look, a clear wood stain works best. Alternatively, you can oil or lacquer them – whichever finish you prefer. For health and environmental reasons, it's best to use water-based stains and lacquers. And don’t forget: allow everything to dry thoroughly!
Instructions for Building the Upper Structure
While the crates are drying, we can get started on the upper structure. This will form the actual bar top and is made from two laminated wood panels. The counter extends slightly beyond the front and sides of the centre section, giving the whole construction a more appealing and well-proportioned look.
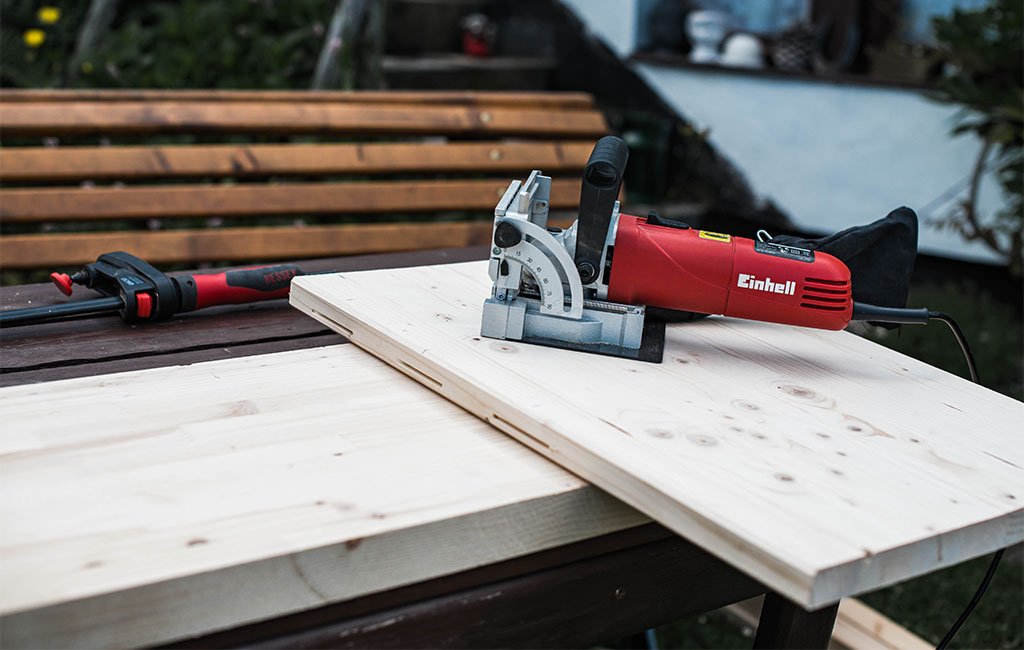
Step 1: Cutting the Laminated Wood Panels
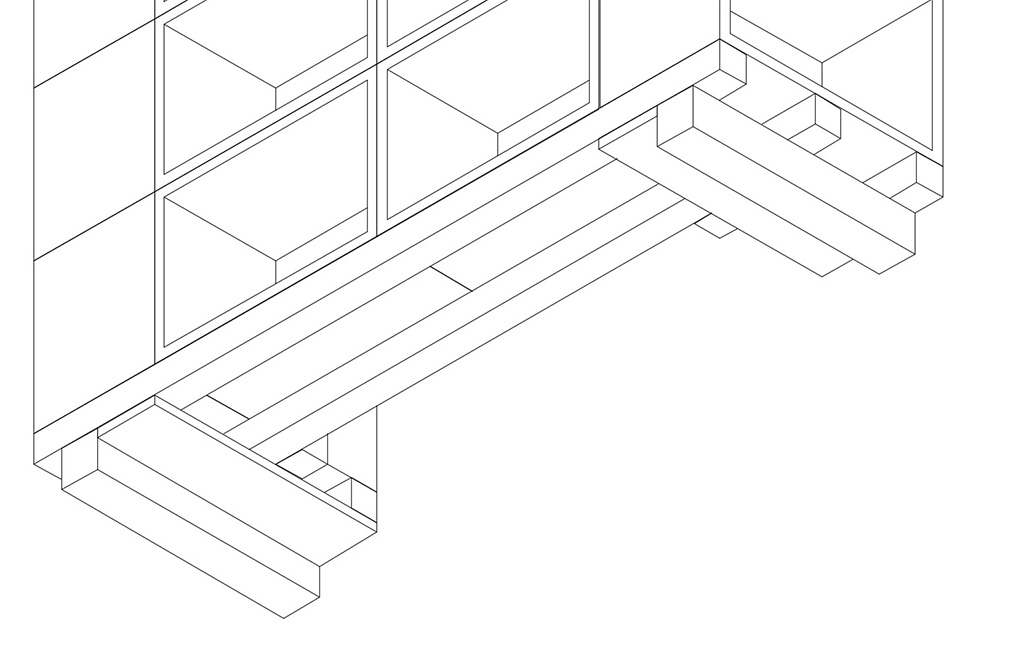
The following diagrams show how the panels are arranged to form the U-shaped bar top, along with the precise measurements for each piece. This layout ensures a clean fit over the centre section while providing the intended overhang on the front and sides.

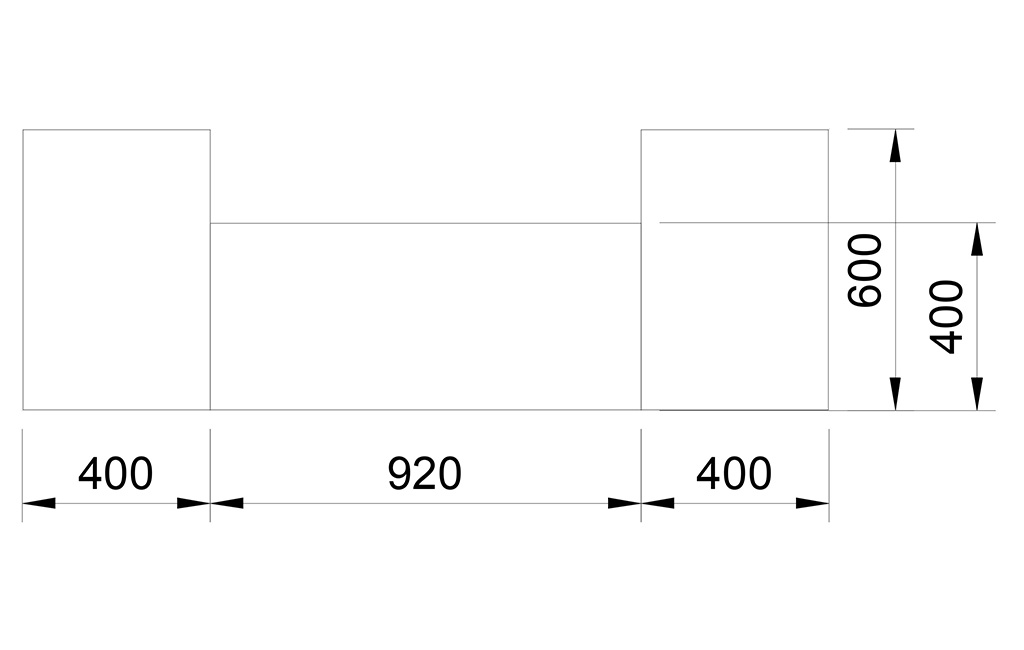
Cut one of the laminated wood panels exactly in half to create the two outer boards for the bar top. Keep in mind that the exact dimensions of the wood can vary depending on the supplier. In my case, cutting the panel produced two boards, each measuring 600 mm.
- Tip: It’s a good idea to measure the actual size of the wood before cutting. Pre-cut timber isn’t always accurate, which can lead to uneven results.
To achieve a more precise outcome, you can subtract a few millimetres from each side before cutting. For example, I marked 599 mm before making the cut.
- Also, when using a circular saw or table saw, be sure to take the blade thickness into account to ensure you end up with two nearly perfect halves.
When cutting the panels with a circular saw or jigsaw, it’s a good idea to use a guide rail or aluminium strip as a straight edge to ensure a clean, straight cut. If you have one, a large carpenter’s square is also very helpful and highly recommended for marking and aligning your cuts accurately.
Now that we have the two side pieces for the bar top, we still need the centrepiece to connect them. Since two wooden crates will be placed underneath this centre section, we’ll cut the second laminated panel to match the combined length of the two crates. In this case: 460 mm per crate × 2 = 920 mm.
Step 2: Assembling the Bar Top
The two side sections and the centrepiece are joined using a biscuit joiner and suitable wooden biscuits. It's helpful to lay out all the parts in their final position beforehand to visualise the assembly and ensure everything lines up correctly before cutting the biscuit slots.

You can also take this opportunity to choose the most attractive sides of the panels for the top surface of the bar. While doing this, I marked the positions for the biscuits at the centre of each joint. I used No. 20 biscuit dowels to ensure greater stability in the final structure.
To add extra stability to the U-shaped panel structure, I screwed square timber reinforcements to the underside of the panels. The total length required is calculated as follows: 350 mm + 350 mm + 920 mm = 1,620 mm.
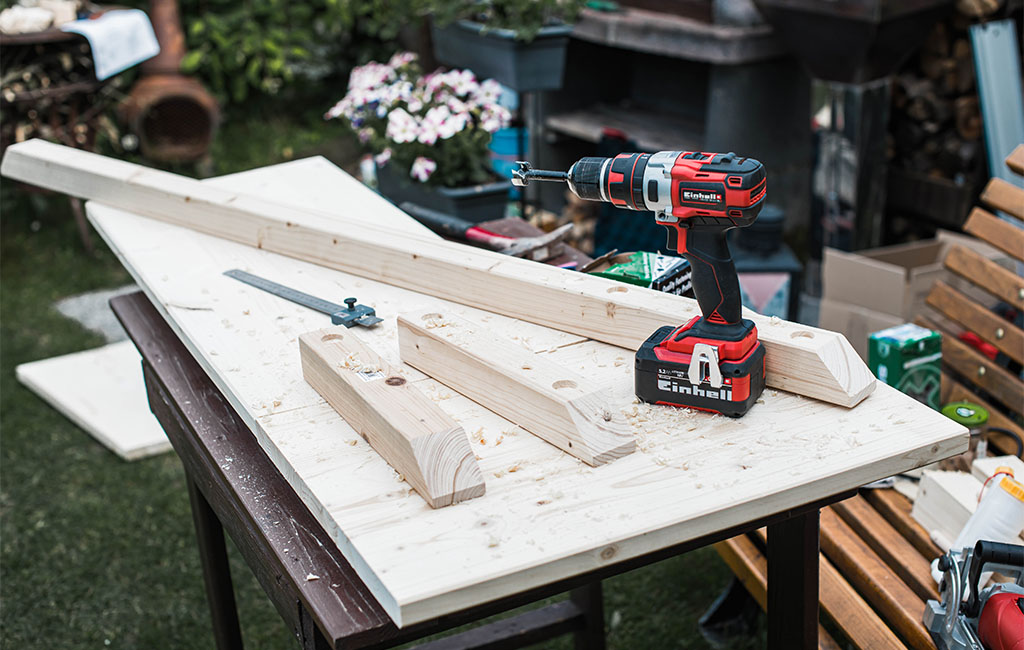
When assembling, make sure the crates line up flush with the edges of the centre panel. Only the side panels extend slightly beyond this, which is why the square timbers were bevelled with a 40 mm chamfer. To do this, a mark was made at 40 mm and cut at a 45-degree angle using the mitre saw. This creates a slimmer look and gives the overall construction a more refined, less bulky appearance.

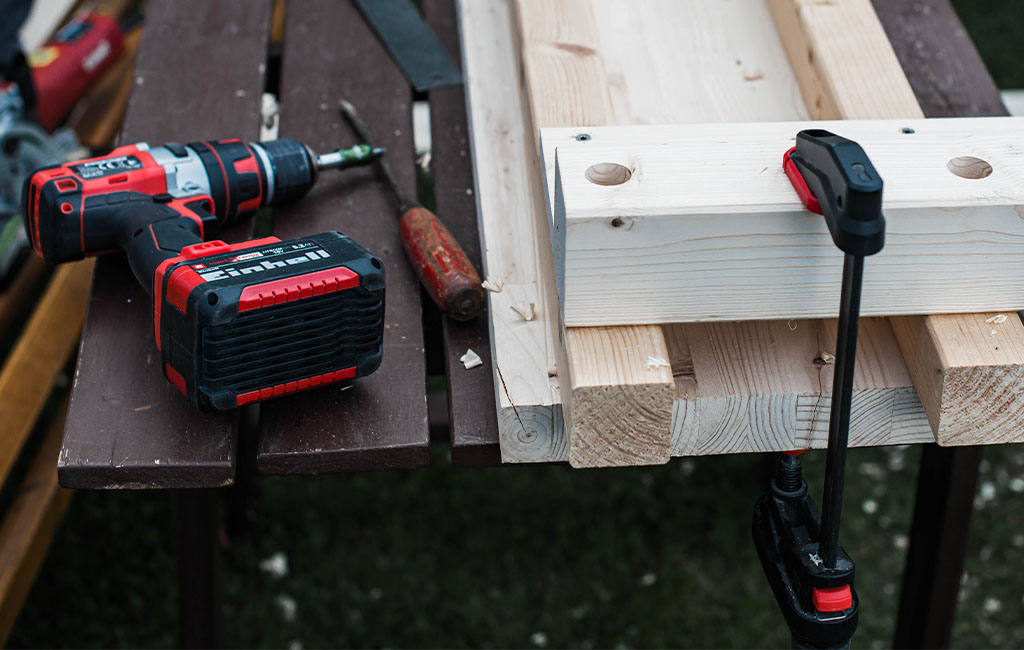
- Pro Tip: Using a vacuum cleaner while sawing will catch most of the wood dust and help keep your garden clean. We also used the Power X-Change cordless version here – convenient and tidy!
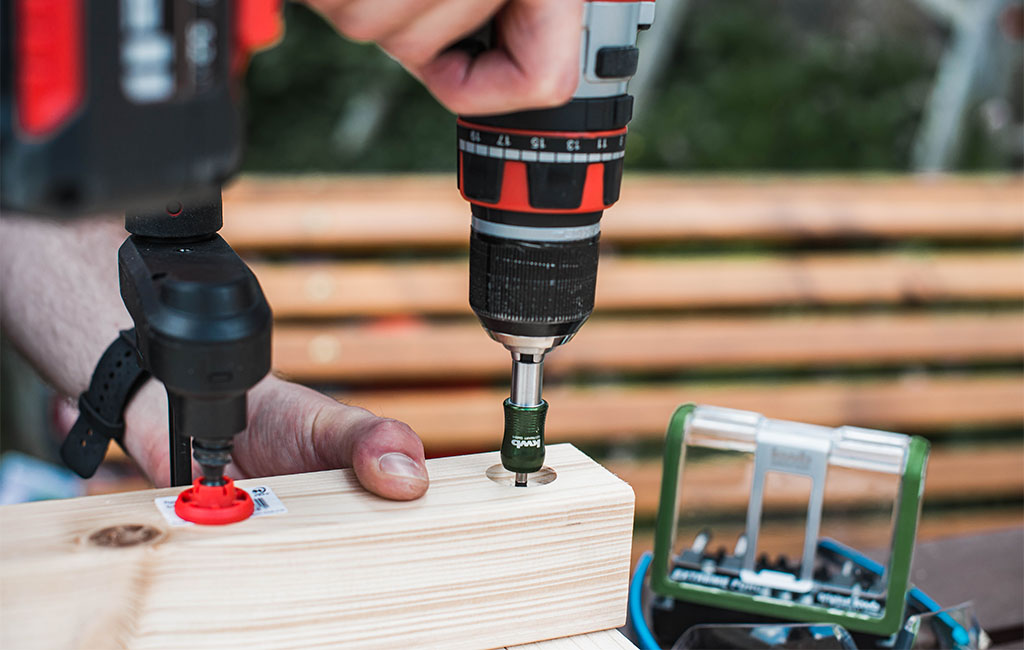
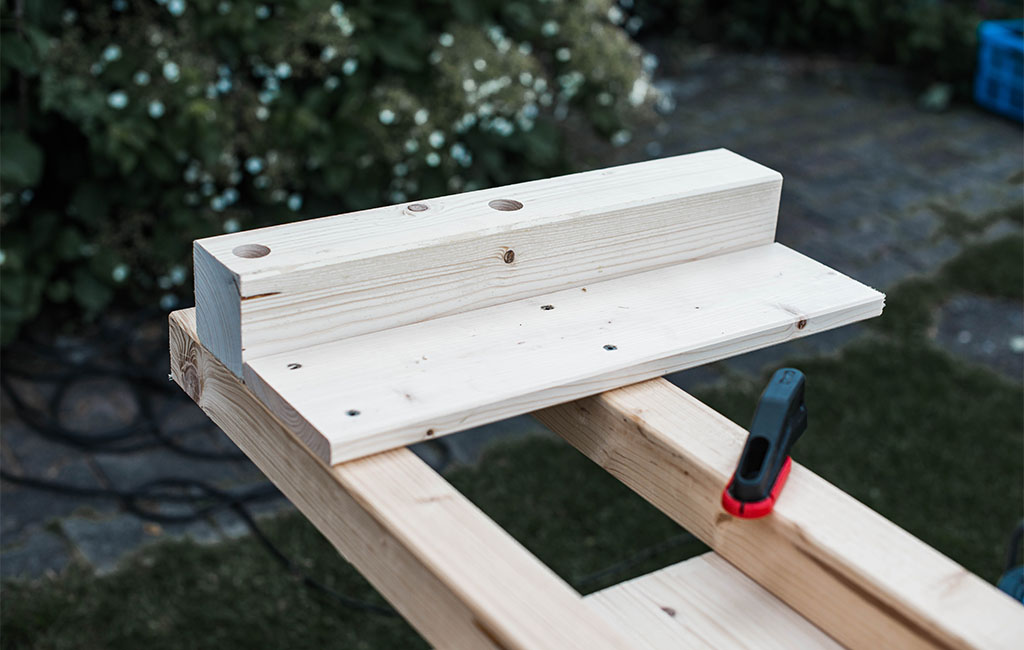
The screws were inserted from underneath, keeping the top of the bar completely free of visible fixings. If the screw lengths don’t fit perfectly, you can use a Forstner bit to countersink them deeper into the wood. In this case, the screws fit perfectly – we just needed to recess the Forstner bit head slightly into the timber. To determine the right depth, simply measure in advance. If needed, you can also stick a small piece of masking tape to the drill bit shaft as a depth marker – a quick and easy guide while drilling.

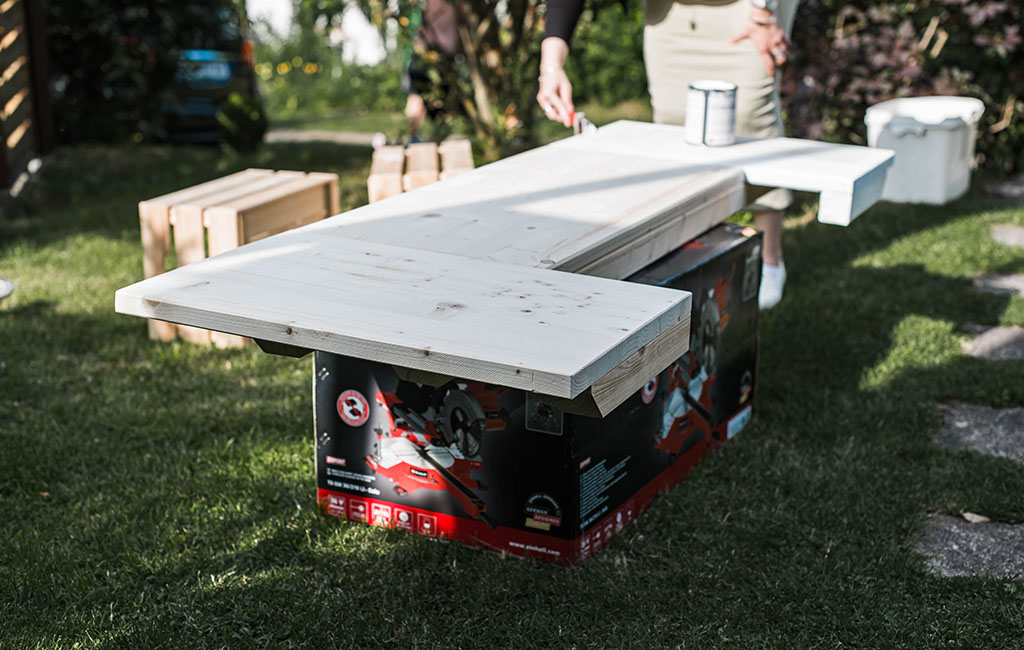
Step 3: Painting the Bar Top
Before moving on to the base frame, now is a good time to paint the bar top. This gives it plenty of time to dry while you complete the lower part of the bar. Outdoors and using a water-based paint (such as PU lacquer), the drying process is fairly quick. Make sure to use a product that is labelled as “saliva-proof,” “food-safe,” or suitable for children's toys, since the surface will later come into contact with food and drinks.
Instructions for Building the Base Frame
While the bar top is drying, you can move on to building the base frame. This structure will later support the crates. The following diagram illustrates the subframe of the bar, which is also made from square timber.
The sketch illustrates how the underside of the bar is designed to provide a stable and secure footing.
Step 1: Cutting the Square Timber
As with the bar top, two 54 x 54 x 2000 mm square timbers were used here. Using the cordless mitre saw, they were quickly and precisely cut to size:
- 2×: 54 x 54 x 1420 mm
- 2×: 54 x 54 x 250 mm
For cross-bracing, two thicker square timbers were added (2× 74 x 74 x 460 mm). These were screwed in place to form a stable substructure.
Once again, we used the Forstner bit here, which meant we didn’t need a wide range of screw lengths. Right next to each thicker timber, we added a reinforcing board (2× 18 x 120 x 460 mm) to increase the overall stability of the frame. This extra layer adds strength and ensures the structure stays solid during use.
As an optional feature, you can mount castors to make the entire bar mobile – especially practical for use on patios or terraces. If you plan to keep the bar in a fixed spot, you can simply leave them out.

Step 2: Mounting the Crates onto the Base Frame
Next, mount the 12 wooden crates onto the base frame and screw them together. To secure them properly, insert screws horizontally on one level, and then drive in additional screws diagonally from underneath. Wood drill bits are ideal for pre-drilling in this case, as their pointed tips make it easier to guide the drill and angle it into the soft pine wood. While this method might not be perfect, it’s very practical and effective for this build. And since the screws are inserted from below, they’ll be completely hidden – unless someone decides to lie down underneath the bar!
This step gives the entire structure both stability and volume. Using clamps is highly recommended during assembly to prevent the crates from shifting while being screwed together. This ensures a clean and secure fit across the whole frame.
Assembly & Finishing Touches
Step 1: Attaching the Bar Top
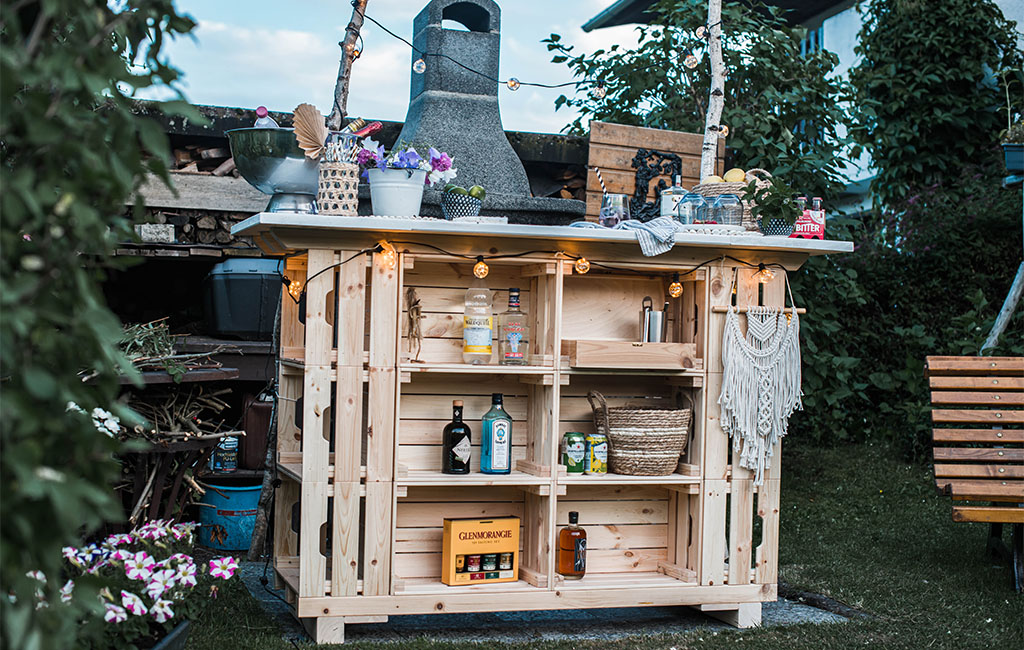
Once all the crates are mounted onto the base frame and everything is securely fastened, it's time to position the bar top. This step is easiest with two people. Carefully place the top onto the structure and align it properly. Then, screw the top section to the wooden crates – and just like that, your bar is complete!
Step 2: Decorate and Enjoy
Now it’s time to stock your bar and personalise it to your taste. For decoration, we added two straight birch branches – alternatively, bamboo poles work just as well. We hung a string of lights from them, which adds charm and also serves as ambient lighting. All that’s left to do is christen your new bar with friends and family – after all, there’s nothing more valuable than quality time with your loved ones.
Have fun building and enjoying your DIY outdoor bar!
Suitable Tools for the Project
Here you'll find Einhell tools and accessories that are perfect for bringing this DIY project to life.

Product was added to the comparison list.
Product was removed from the comparison list.
Open comparison listIn this article you will learn all about:

Published on 03.08.2021
From professional to professional: With their expertise in garden care, our garden specialists help you create your perfect green oasis. Daniel Laqua is a freelance blogger and a passionate hobby gardener. Whether it's lawn care, hedge trimming, or irrigation – in his blog posts, you'll find all the essential information about Einhell devices for the garden and terrace.